


Choose a conference table from the seating layout, not the headcount printed beside it. Six, eight, ten or twelve places depend on chair width, space along the edge, usable end positions and the supports below the top.
For designers and office buyers, conference table dimensions are a starting point—not proof that everyone will fit. The worksheet below shows exactly how its example lengths are calculated, then checks the chairs, room and a real product listing.
These are preliminary planning examples, not measured seating tests or universal minimums. Confirm the final layout with the actual chair and table configuration before ordering.
Choose a starting size for 6, 8, 10 or 12 people
For the assumptions below, calculated table lengths are 84, 114, 144 and 174 inches for 6, 8, 10 and 12 places. These are worksheet results, not standard product sizes or guaranteed capacities. Saltwoods’ seating guide suggests about 28–30 inches per office place and warns that chairs and table bases affect fit. We use 30 inches as one planning choice.
Table: a straight-sided rectangular top, assumed 48 inches wide. The chart does not specify table height; check that with the chair.
Side seats: allow 30 inches along the edge per person. This is seat pitch—the space assigned to a place, not the chair’s seat-cushion width.
End reserve: set aside 12 inches at each end of each long edge. This chosen buffer is not a proven knee-clearance requirement; increase it if the real layout needs more.
End seats: one at each short end, counted only if the corner, knee and base checks pass. No support may block a planned place.
Hypothetical sizing worksheet—verify end positions separately | ||||
Target places | Layout: side + side + ends | Calculated length | Assumed width | Approx. L × W, mm |
|---|---|---|---|---|
6 | 2 + 2 + 1 + 1 | 84 in (7 ft) | 48 in | 2134 × 1219 |
8 | 3 + 3 + 1 + 1 | 114 in (9.5 ft) | 48 in | 2896 × 1219 |
10 | 4 + 4 + 1 + 1 | 144 in (12 ft) | 48 in | 3658 × 1219 |
12 | 5 + 5 + 1 + 1 | 174 in (14.5 ft) | 48 in | 4420 × 1219 |
Millimeters are rounded to the nearest whole number using 25.4 mm per inch. If a supplier offers only certain sizes, compare the next suitable size and repeat the room check. Do not round down and keep the same claimed capacity.
Use the formula with your own inputs
Required long edge = (side seats × seat pitch) + both end reserves. For eight places in this layout: (3 × 30) + 12 + 12 = 114 inches.
For a candidate table, side places = round down [(length − both reserves) ÷ pitch]. Add only end positions that pass a separate fit check. Curved edges and support obstructions need an actual layout, not this straight-edge shortcut.
Measure the chair and workspace, not just the top
Measure the widest part of the actual chair, including its arms. Then check the space needed to sit, turn and work. A 24-inch-wide chair within a 30-inch pitch leaves six inches of extra width in total—not six inches on each side. That arithmetic alone does not establish comfort.
Item | Description |
|---|---|
Overall chair width | Use the external width, not just the seat cushion. Include protruding arms and check the base during movement. |
Chair arm height | Measure at the intended seated adjustment. Compare it with the underside of the top, apron or other obstruction—not the tabletop height. |
Clear knee and foot space | Measure to the nearest pedestal, leg, crossbar or equipment below the table. Outer table dimensions do not reveal this space. |
Working depth | Mark the space for a laptop and papers in front of each seat, plus any shared equipment in the center. |
Vintage Industrial’s sizing guidance also treats wider chairs as a reason to increase the space per place. Use a real chair trial to choose your allowance. For depth, a hypothetical 48-inch-wide top could be divided into two 20-inch work zones and an eight-inch center strip; check actual devices before adopting that division.
Record chair width, arm height, seat-height setting and the base’s movement area together.
Check both the tabletop and the underside drawing. An apron—the frame below the edge—can stop chair arms from sliding in.
If equipment occupies the center, reserve its full physical footprint. Table width does not confirm electrical compatibility.
Count end seats only after checking corners and supports
An end chair needs its own clear space above and below the table. It may overlap the working area or knees of the nearest side users. Arc Grove’s capacity guide distinguishes long-side seating from layouts that add end places; check which arrangement a supplier’s number describes.
Mark each side chair’s center on the actual top outline. Keep the reserved zones visible rather than quietly using them for another chair.
Place one end chair and the neighboring side chairs in position. Check elbows, documents, knees and the ability to leave the seat. Enlarge the reserved zones or remove a position if they conflict.
Add the support footprint. A central pedestal may avoid corner legs but still obstruct feet; a panel or crossbar may block a side position. Measure the selected base, not a similar-looking one.
For an oval, racetrack or boat-shaped top, use the real outline. The maximum length is not all straight usable edge, and the width near an end may differ from the center.
What changes when the ends stay empty?
In the eight-person example, move from three to four places on each long side. Keeping the same 30-inch pitch and both 12-inch reserves gives (4 × 30) + 24 = 144 inches, rather than 114 inches.
The extra 30 inches comes from this chosen arrangement. It is not a rule that every table needs 30 more inches when its ends are open.
If a base blocks one planned position, do not simply subtract its width from the whole table and divide again. Check each clear segment and the adjoining seats separately. A curved top or different base can change the answer, but its shape alone does not earn extra seats.
Test the table footprint against the occupied room
Measure from the table edge to the nearest obstruction, not automatically to the wall. A cabinet, column or open door can become the limiting boundary. OnTimeSupplies’ size chart pairs a 120-by-48-inch top with an 18-by-12-foot room; the arithmetic below explains that envelope without treating it as a compliance minimum.
Draw the usable room length and width. Mark fixed storage, columns, door swings and equipment positions before placing the table.
Choose the space to allow at each side and end. Room length = table length + both end allowances; room width = table width + both side allowances. The allowances need not be equal.
Add chairs in their occupied and pulled-back positions. Check the remaining route, cabinet access and door movement, not just the bare tabletop outline.
Have the responsible designer or facilities reviewer check accessibility, egress and local requirements. A furniture chart cannot approve these.
Hypothetical room check
An unobstructed 18 × 12 ft room is 216 × 144 inches. Centering a 120 × 48-inch top leaves (216 − 120) ÷ 2 = 48 inches at each end and (144 − 48) ÷ 2 = 48 inches at each side.
That is 48 inches from the table edge—not a 48-inch clear walkway behind seated people. If an occupied chair projects 24 inches beyond the edge, only 24 inches remains before the wall. The chair projection here is an assumption, not a typical-chair specification.
Repeat the calculation with measured chair positions and the real obstructions. If it fails, shorten or reposition the table, reduce the planned seats, or review the room arrangement. Do not recover space by counting a door swing or occupied-chair zone as an available walkway.
Read the Hori listing without assuming a seat count
The SpaceUnited Hori conference table specification lists model SU-DT-Hori-10 with an outer size of 2400 × 1200 × 750 mm. Read that as a published dimension row, not a ten-seat promise. The model suffix does not establish a seating capacity.
What the SU-DT-Hori-10 listing establishes—and what to confirm | ||
Item | Published information | Still needed for fit |
|---|---|---|
Width × depth × height | 2400 × 1200 × 750 mm; about 94.5 × 47.2 × 29.5 in | Confirm these dimensions on the drawing for the ordered version |
Top and support outline | Product images show the general arrangement | Dimensioned outline, base footprint and distances to each edge |
Usable space below the top | No clear knee/arm dimensions verified | Clear underside height and knee/foot space at every planned place |
Version and labels | Page describes fixed and lifting versions; some filter labels differ from the body | Written confirmation of the exact top, base and version |
Do not apply the rectangular worksheet directly to this curved top. Its published outer dimensions cannot show where the usable edge ends or how close a seated person comes to the pedestal. Resolve the differing labels before treating the listing as an order specification.
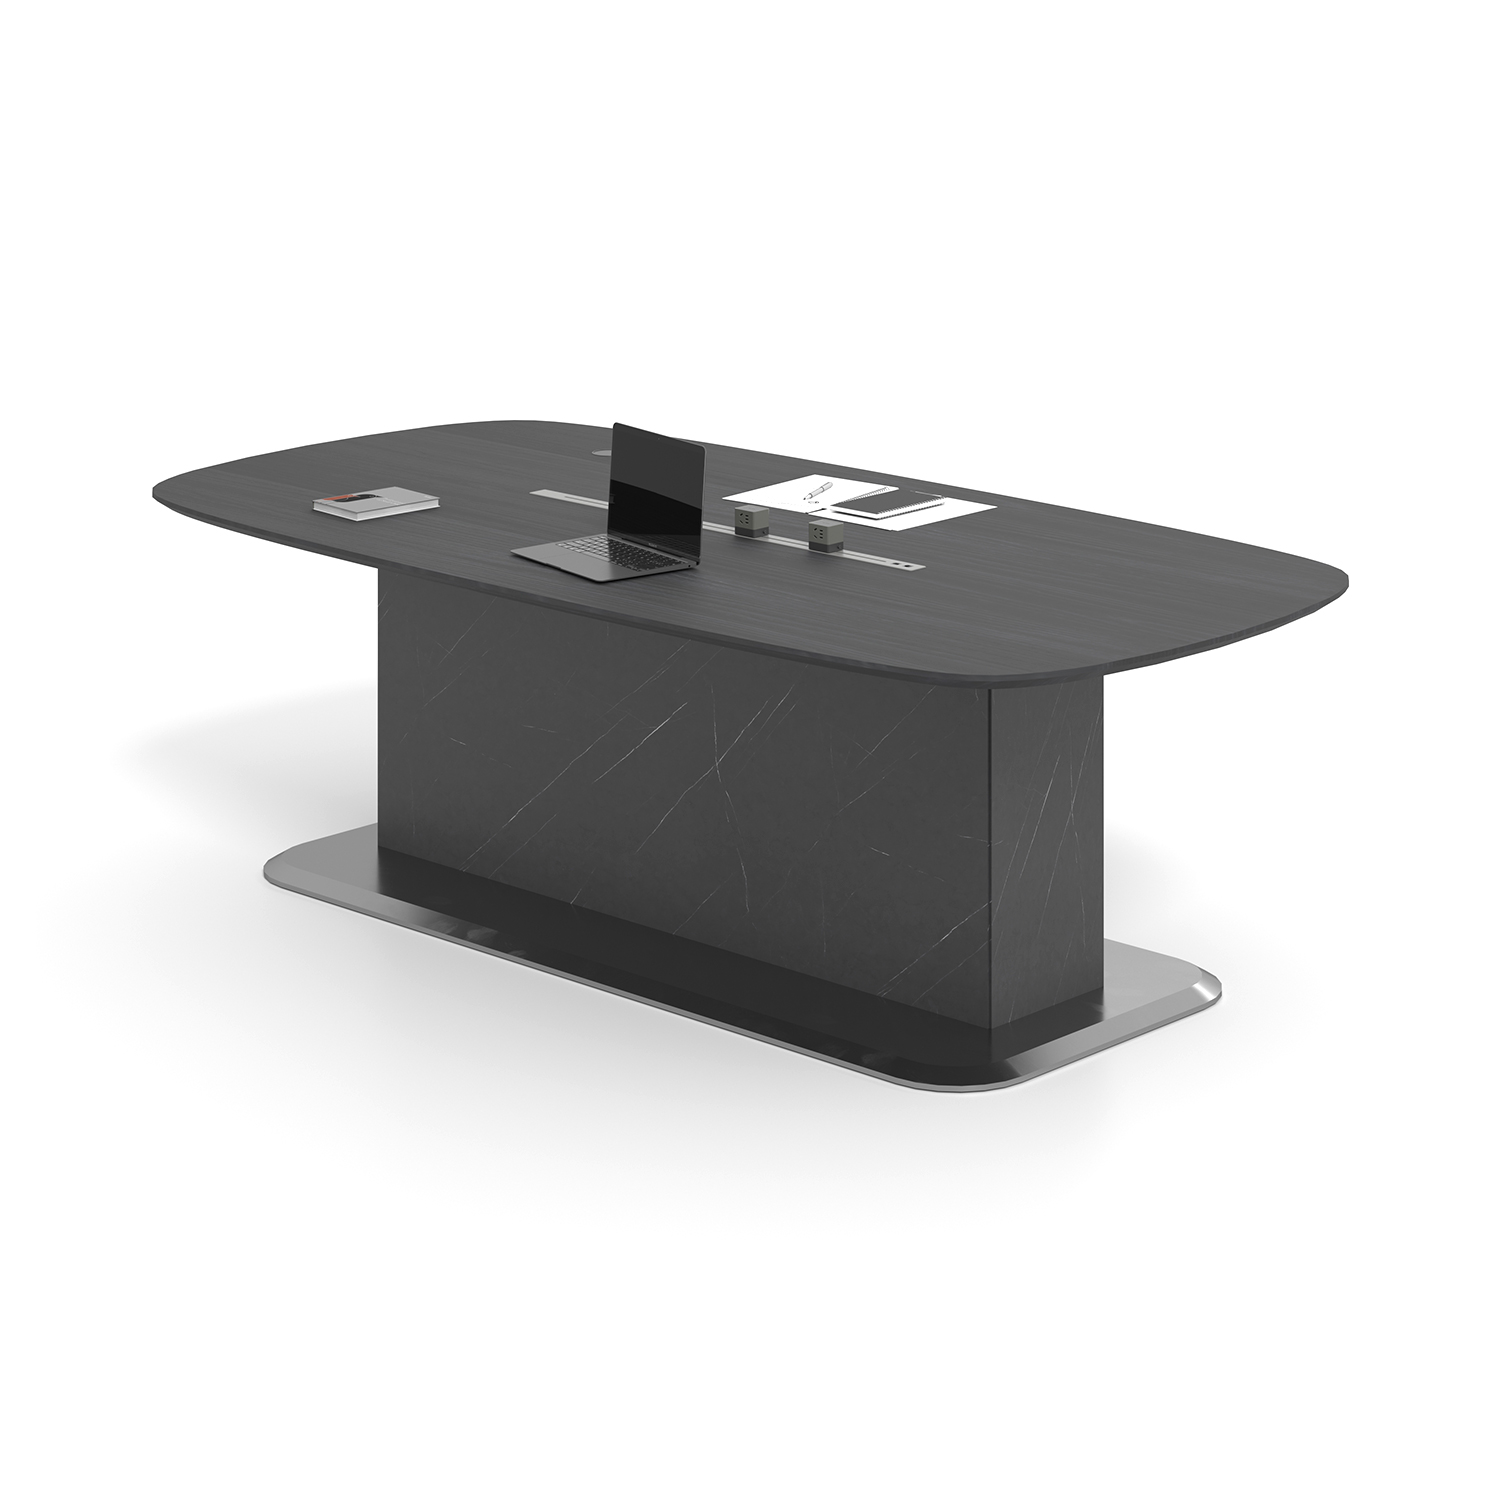
Manufacturer image from the Hori listing. It shows the top and base arrangement, not measured knee clearance or verified seating capacity.
Ask for a top view and side view showing the selected base and clearances, not only the overall dimensions.
Place the intended chairs on that drawing; do not count the chairs in a promotional image as capacity evidence.
Keep the confirmed model, size and configuration together on the order record. If they remain unclear, hold the selection.
Turn the estimate into an order-ready fit check
Use the estimate to prepare a fit check, then try the proposed furniture with its users. CCOHS purchasing guidance recommends staff testing before the final decision. A taped floor outline helps locate the table, but cannot reproduce the underside or the way a real chair moves.
Attendance: record daily seats and occasional extra seats separately, including which short ends must remain open.
Table: attach the model, version, outer dimensions and top-view drawing, with the base and under-top obstructions marked.
Chairs: record each candidate’s model, external width, arm height and occupied/pulled-back positions.
Place-by-place fit: mark side centers, end reserves, workspace and clear knee/foot zones. Identify any seat that depends on an unverified assumption.
Room: show doors, cabinets, equipment and the remaining routes with people seated. Assign the required local review to the responsible project reviewer.
Approval: keep the dated drawing, trial observations and supplier clarifications together. Resolve conflicting dimensions before confirming the order.
Compare conference chair options by asking people to enter, sit, use their normal meeting materials and leave the proposed positions. Note where a chair hits a support or blocks another person. A failed check should change the layout or furniture choice—not disappear from the purchase record.
Frequently asked questions
What if the meeting chairs are different widths?
Check each model and its assigned position. For a flexible arrangement where chairs move between places, use the widest intended chair as the starting case, then test turning and access with the actual mix.
Can two people sit at each short end?
Do not add that pair to the worksheet without a separate layout. Both places must share the available end width while avoiding the adjacent side users and the base; the one-seat-per-end assumptions no longer apply.
Should occasional visitors determine the everyday table size?
Record routine and peak attendance separately. If extra visitors must work at the table, include them in a checked layout; a spare chair against the wall is not an extra table place.
What if the supplier cannot provide an underside drawing?
Keep the capacity decision open. Ask for labeled measurements or a trial of the exact configuration; a top-view photo or a similar product’s drawing does not establish the missing knee, foot or arm clearances.
Confirm the layout before you confirm the table
A useful size estimate records who sits where, how much edge each place receives, and which spaces still need checking. Keep the chair, top, base and room drawings together so a changed component triggers a fresh fit check.
Ready to confirm a configuration? Send your room dimensions, target seating and intended chair measurements through SpaceUnited’s contact page. Ask for the drawing and dimensions for the exact table/base version you are considering.


Large Conference Tables: What Shape Should You Choose
The shape of large conference tables affects how people talk in meetings. A good design helps more people join in and ensures everyone can speak. People see that round or oval large conference tables help everyone take part, but rectangular tables make things more organized and less lively.
/ Read More
What Materials Make the Best Boardroom Conference Tables
Selecting the right material for a boardroom conference table shapes the workspace’s image and performance. Top choices include solid wood, veneer, laminate, metal, glass, and innovative materials. Companies value durability and style most when choosing table materials, as shown below:FactorImportan
/ Read More
Office conference table buying guide with real numbers
Choosing the right office conference table starts with measuring the room. You need to plan for easy movement around the table. A 10-foot table can seat 8 to 10 people. A 12-foot table can fit up to 12 people. Check the table below for a quick guide:Table Length (Feet)Seating Capacity64 – 686 – 8108
/ Read More
How to Find the Perfect Conference Table for Your Meeting Room
The perfect conference table fits the room. It meets every need. It shows a professional environment. Many groups have problems picking a conference table. Some problems are space, shape, and comfort.
/ Read More